User Guide
Pied Piper
Pied Piper is a user-friendly task management and performance tracker application tailored for current and future university student leaders. The app helps them stay organised and prepare for real-world situations by helping them manage project groups, and simulate the real world review system. Key features include creating tasks, assigning tasks to team members, setting due dates, rating completed tasks out of 5, and providing feedback through comments. The ability to seamlessly toggle between a person list and task list also helps team leaders easily identify each team members’ roles and their assigned task to complete. Ideal for personal projects and team collaboration, Pied Piper aims to improve productivity and equip university students with valuable skills for their future careers.
Some of our main features:
- Adding tasks with or without due dates.
- Adding team members and assigning them to created tasks.
- Mark tasks as complete and give a rating to gauge the performance of each member.
- Review each member’s overall performances based on the tasks completed.
This user guide provides a broad overview of how the various features work and how to use them properly. We hope you have fun using Pied Piper and may all your future endeavors be elevated with our product!
Table of Contents
- 1. Quick Start
- 2. Features
- 2.1 Add person
- 2.2 Add regular task
- 2.3 Add deadline task
- 2.4 Add event task
- 2.5 Add comment to task
- 2.6 Edit a person
- 2.7 Edit a task
- 2.8 Assign task to member
- 2.9 Mark a task
- 2.10 Unmark a task
- 2.11 Delete a person
- 2.12 Delete a task
- 2.13 List persons
- 2.14 View tasks
- 2.15 Review
- 2.16 Help
- 2.17 Lighting modes
- 3. FAQ
- 4. Checking my Java version
- 5. Command summary
1. Quick start
1.1 Installation
-
Ensure you have Java
11or above installed in your Computer. If you aren’t sure of the version, follow these instructions. If you don’t have Java downloaded or have an outdated version, download it here. -
Download the latest
piedpiper.jarhere. -
Copy the file to the folder you want to use as the home folder for Pied Piper.
-
Open a command terminal,
cdinto the folder you put the jar file in, and use thejava -jar piedpiper.jarcommand to run the application. If you need help on how to navigate the command terminal, check out this link.
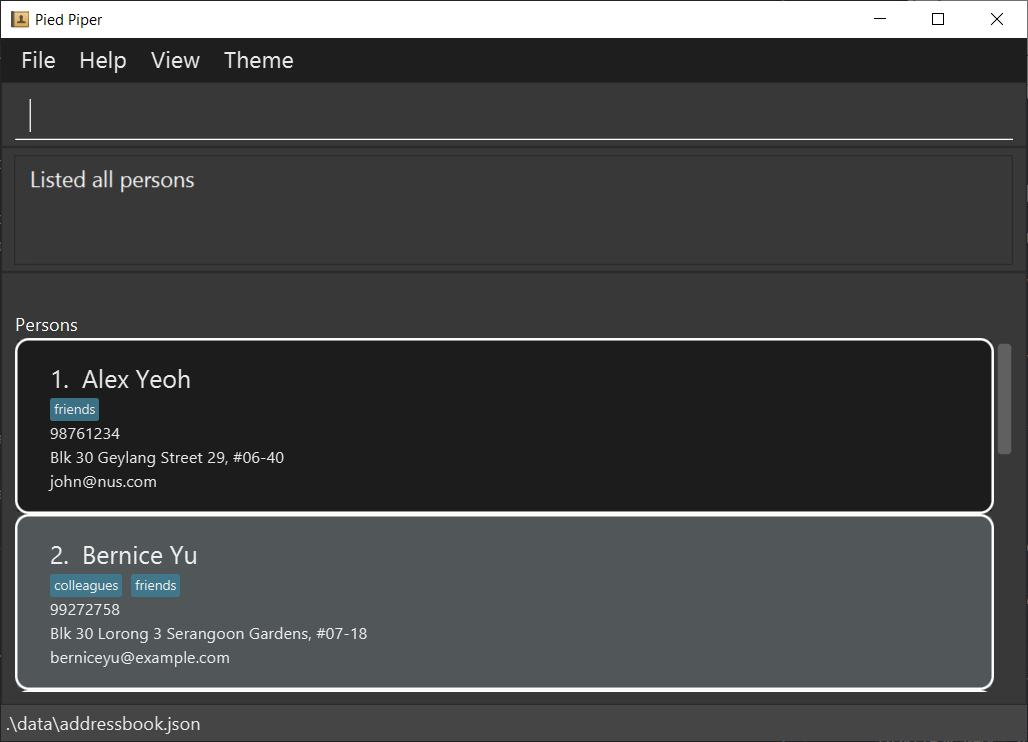
A GUI similar to the below should appear in a few seconds. Note how the app contains some sample data.

1.2 App overview
1.2.1 Types of interfaces
Pied Piper supports 2 types of lists, a PersonList and a TaskList.
The person list can be viewed using the list command.
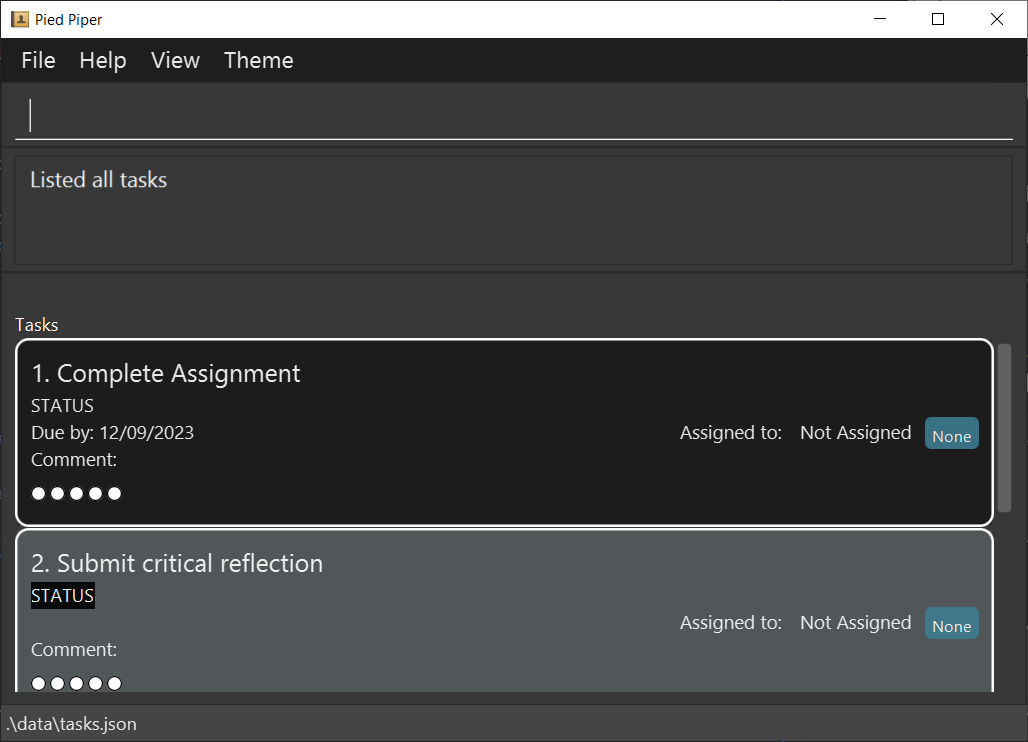
The task list can be viewed using the view command.
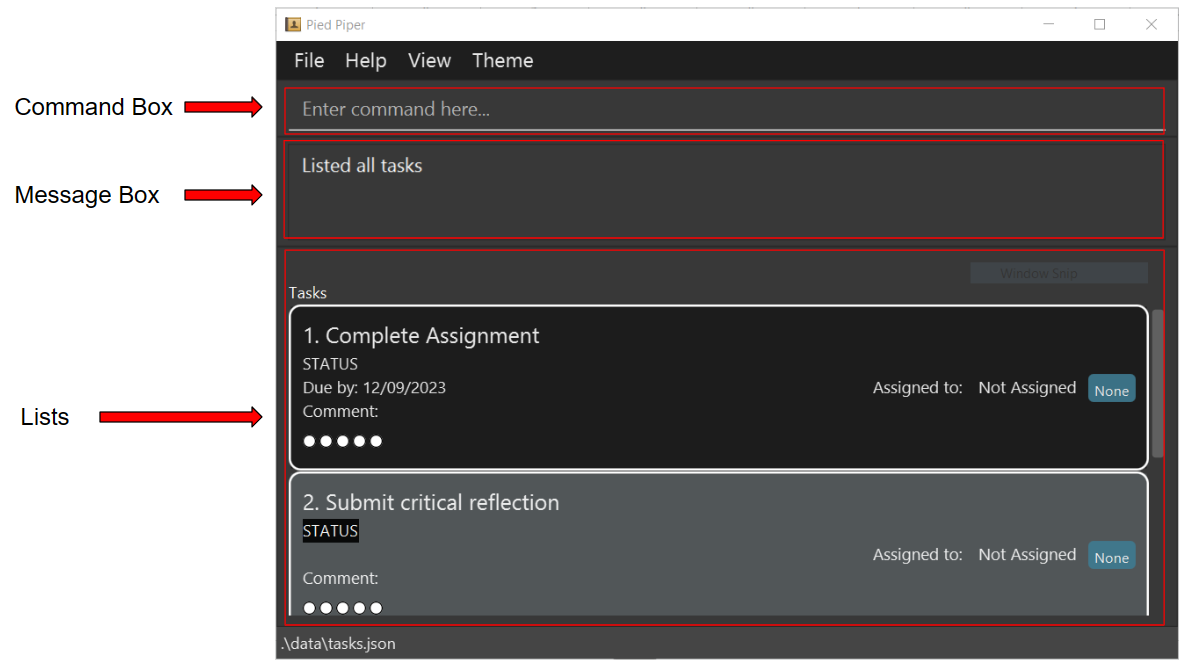
1.2.2 Layout
Command Box: This is where you type in commands to work your way around Pied Piper. A quick summary of commands can be found here.
Message Box: This is where Pied Piper provides feedback to show what actions have just been done, as well as to display error messages if you input the wrong commands.
Lists: Depending on whether you chose to display the PersonList or the TaskList, this window shows you all
currently stored persons or tasks.
1.2.3 Key definitions
-
Words in
UPPER_CASEare the parameters to be supplied by the user. -
All dates must be in the format of
DD/MM/YYYY. Dates also cannot be from a date before the present date. -
Words in front of
/are parameter prefixes that need to be included when inputting the parameters.
e.g. When adding atodotask, the format istodo task/TASK_NAME. If your task name is ‘Homework’, the full command will betodo task/Homework. -
As a result of the above, the character
/cannot be used in any parameters. -
Items in square brackets are optional.
e.g.a/ADDRESS [r/ROLE]can be used asa/John street, block 123 r/Memberor asa/John street, block 123. -
Extraneous parameters for commands that do not take in parameters (such as
view) will be ignored.
e.g. if the command specifiesview 123, it will be interpreted asview. -
Note what the status colours denote:
default colour for status.
task has been marked as completed.
today is the deadline for the task.
deadline has passed.
2. Features
- 2.1 Add person
- 2.2 Add regular task
- 2.3 Add deadline task
- 2.4 Add event task
- 2.5 Add comment to task
- 2.6 Edit a person
- 2.7 Edit a task
- 2.8 Assign task to member
- 2.9 Mark a task
- 2.10 Unmark a task
- 2.11 Delete a person
- 2.12 Delete a task
- 2.13 List persons
- 2.14 View tasks
- 2.15 Review
- 2.16 Help
- 2.17 Lighting modes
2.1 Adding a person: add
Adds a person.
Format: add n/NAME p/PHONE e/EMAIL a/ADDRESS [r/ROLE]
Examples:
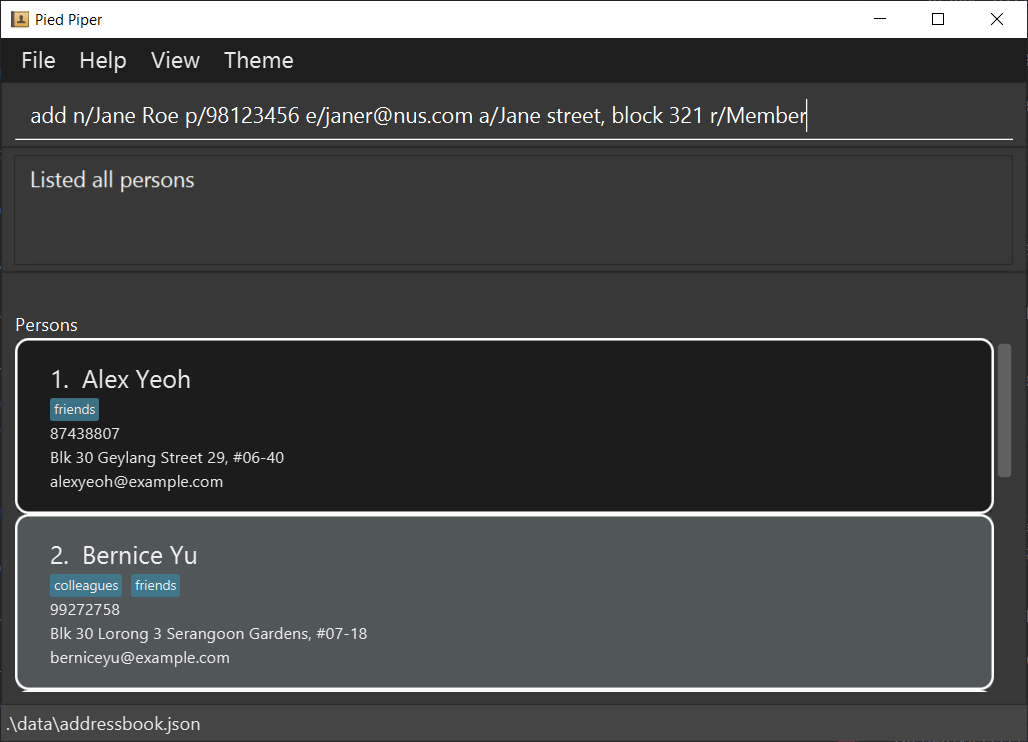
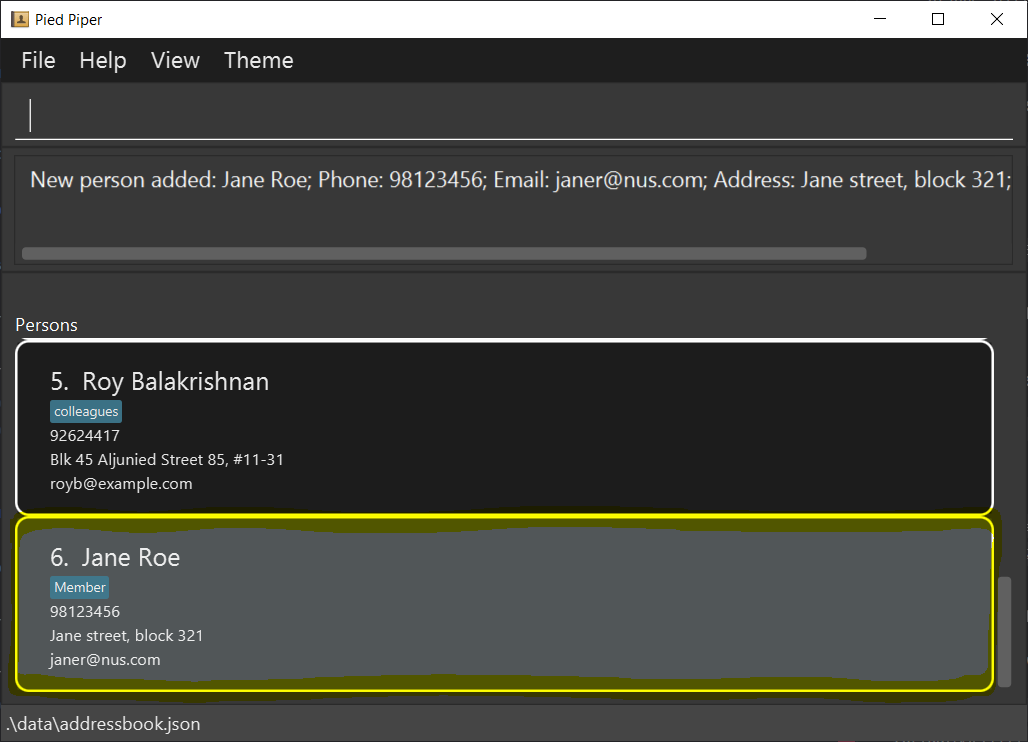
add n/John Doe p/98765432 e/johnd@nus.com a/John street, block 123add n/Jane Roe p/98123456 e/janer@nus.com a/Jane street, block 321 r/Member
Before:
After:
2.2 Creating a regular task: todo
Creates a new task.
Format: todo task/TASK_NAME
Example:
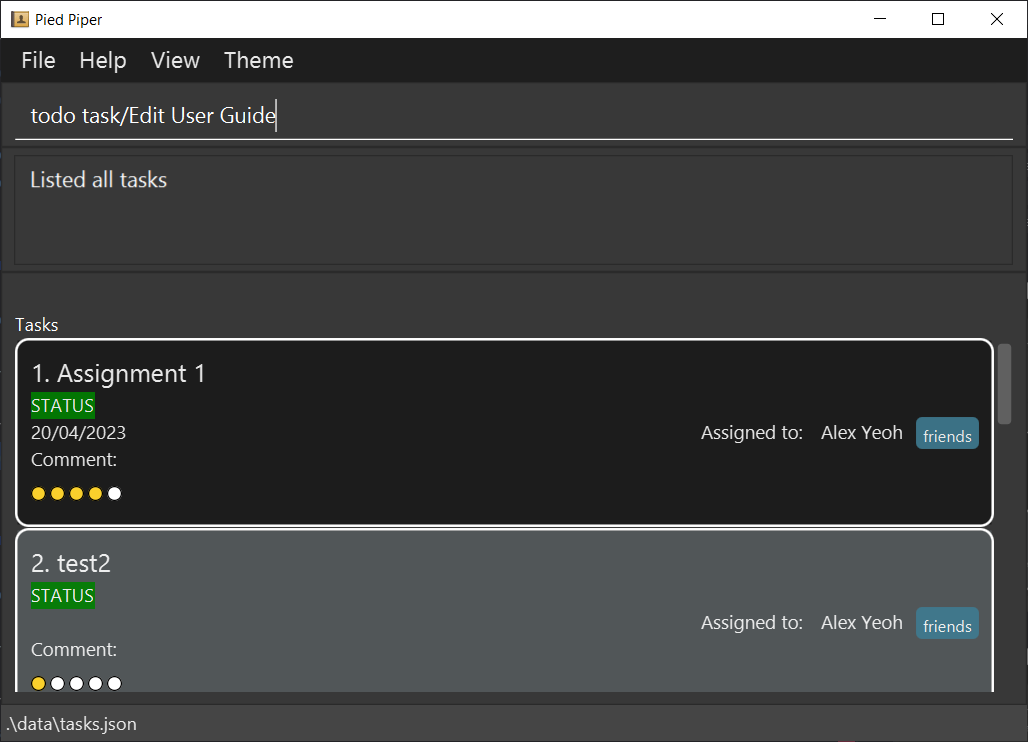
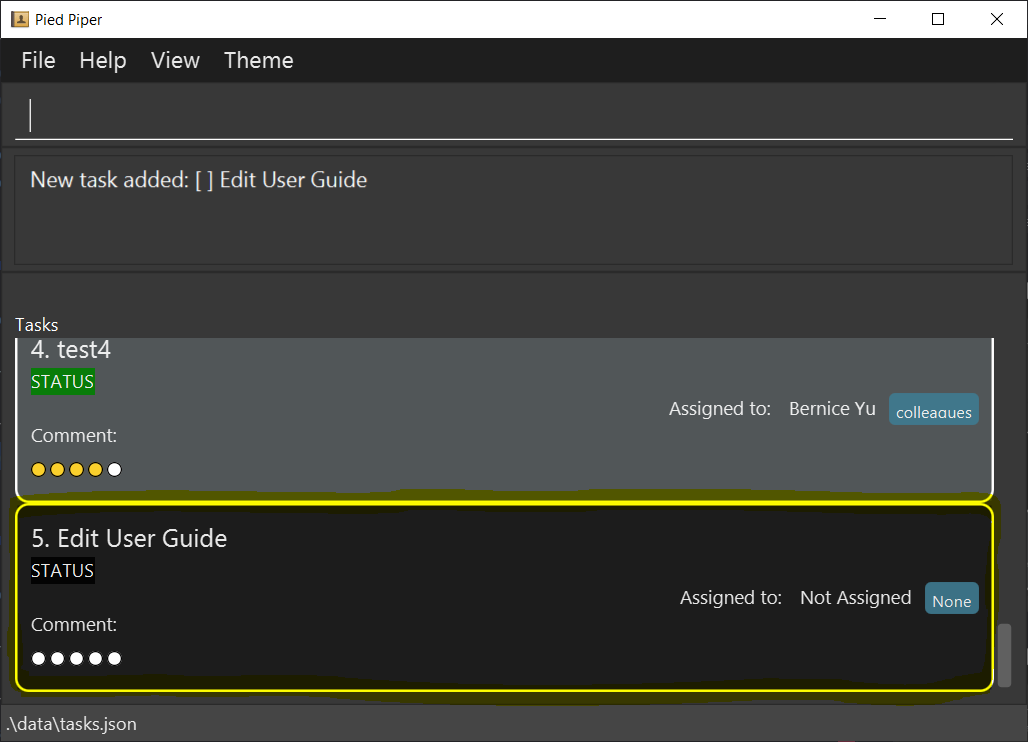
todo task/Edit User Guide
Before:
After:
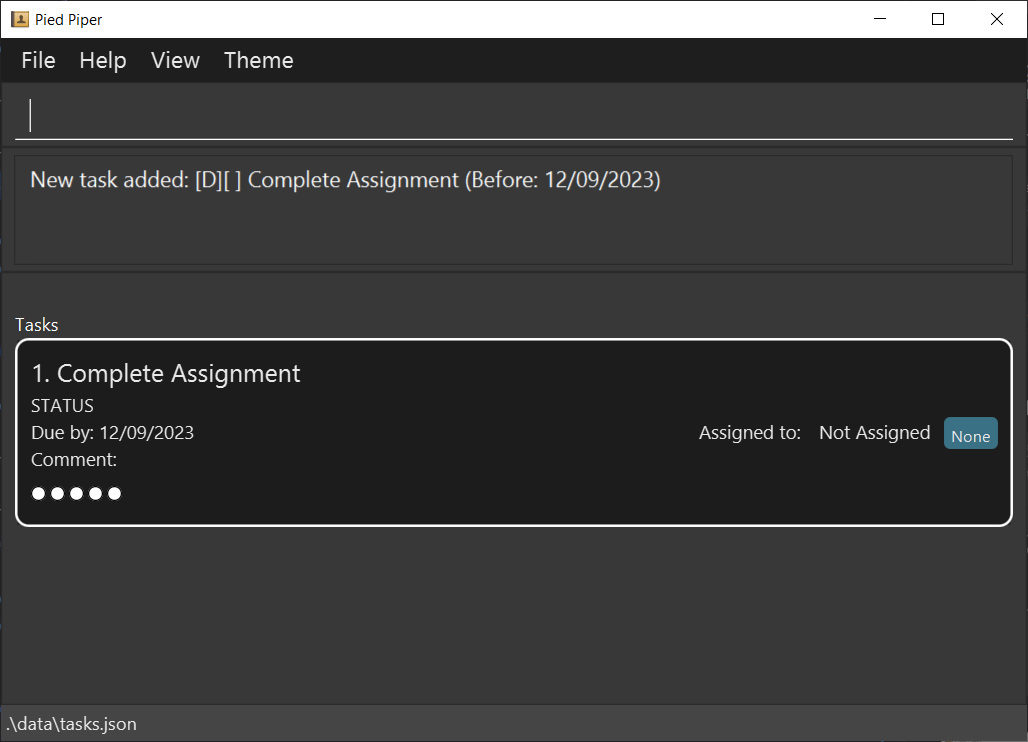
2.3 Creating a task with a deadline: deadline
Creates a new deadline task.
Format: deadline task/TASK_NAME by/DATE
Example:
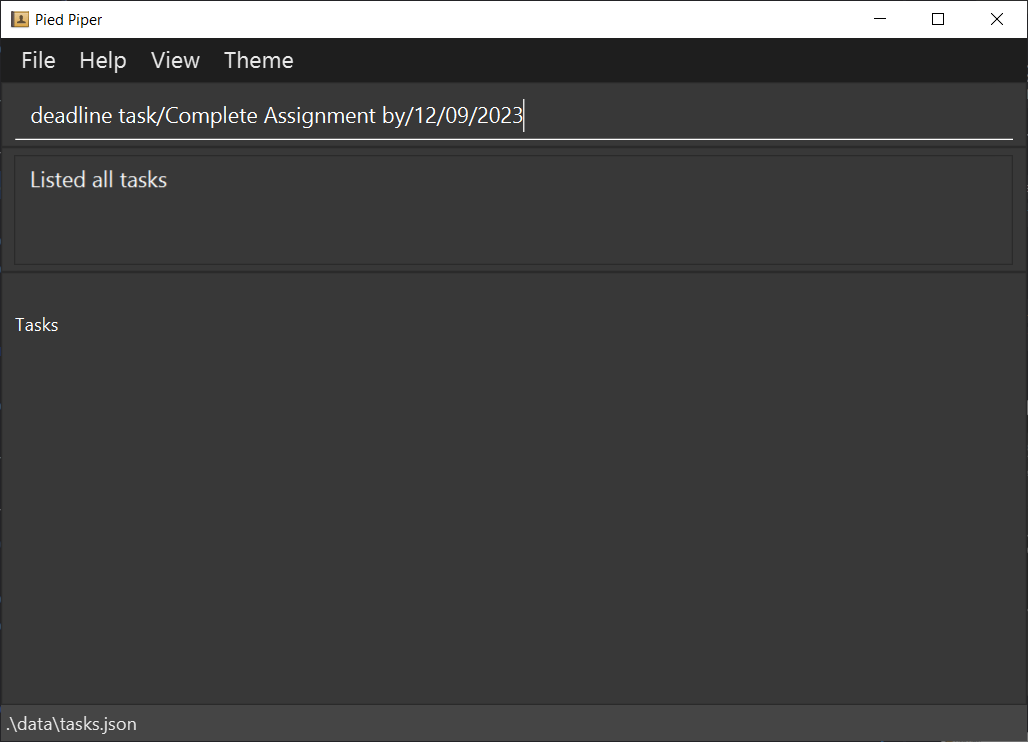
deadline task/Complete Assignment by/12/09/2023
Before:
After:
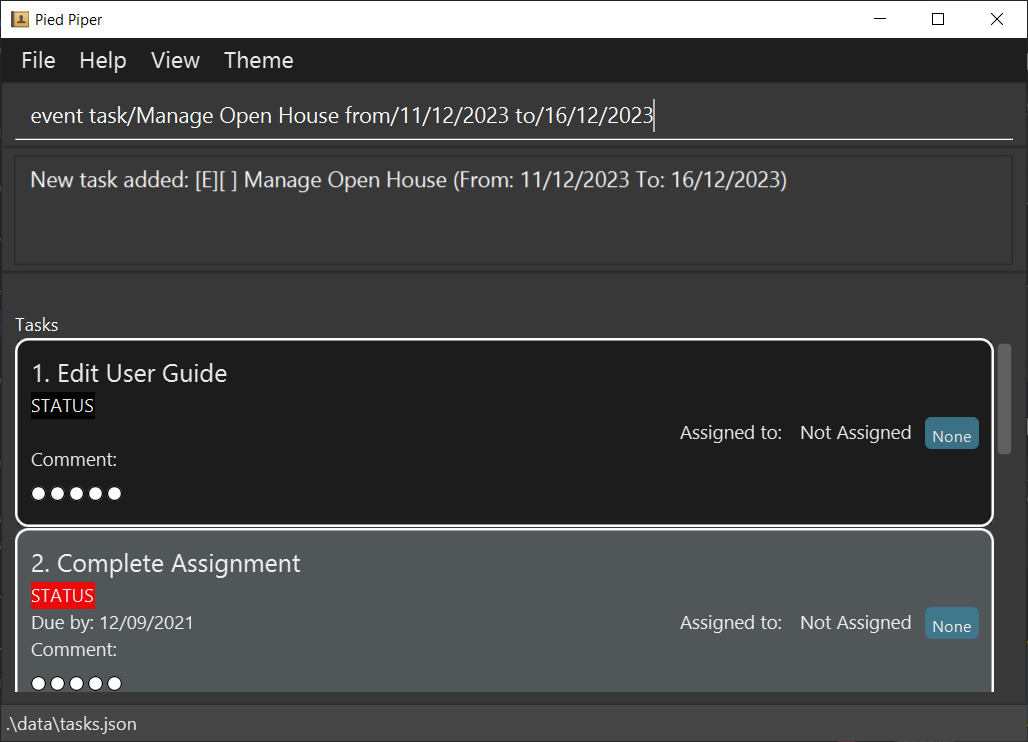
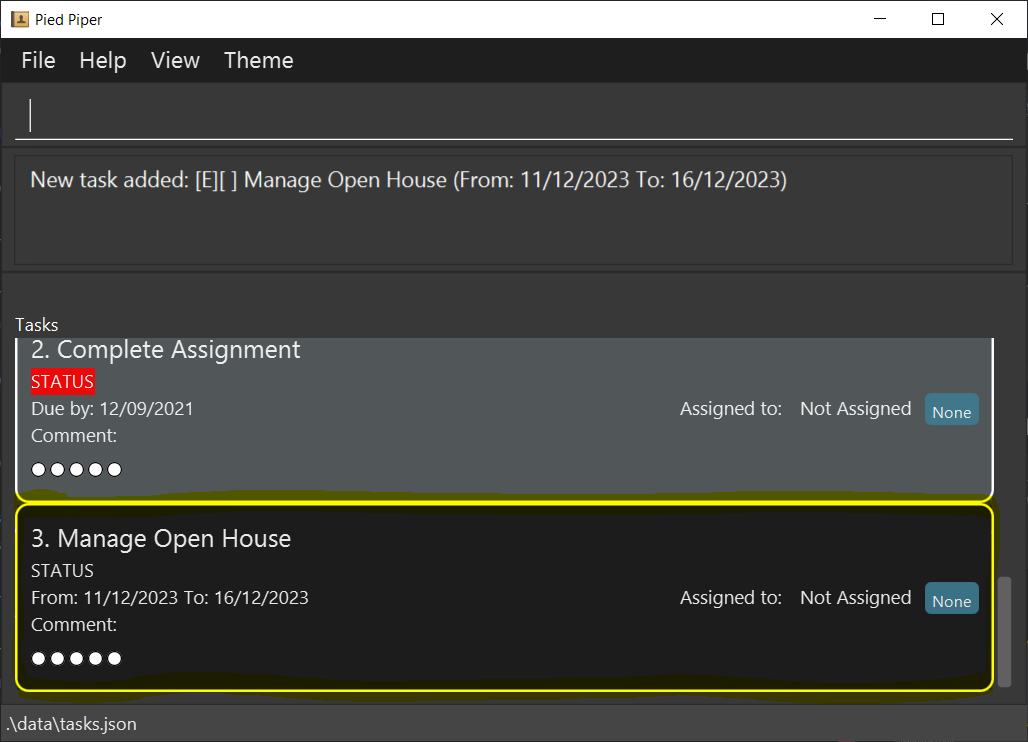
2.4 Creating a task that is an event: event
Creates a new event task.
Format: event task/TASK_NAME from/DATE to/DATE
Note: The dates input must follow chronological order, meaning the date supplied to the to/ field must come after the
date supplied to the from/ field.
Example:
event task/Manage Open House from/11/12/2023 to/16/12/2023
Before:
After:
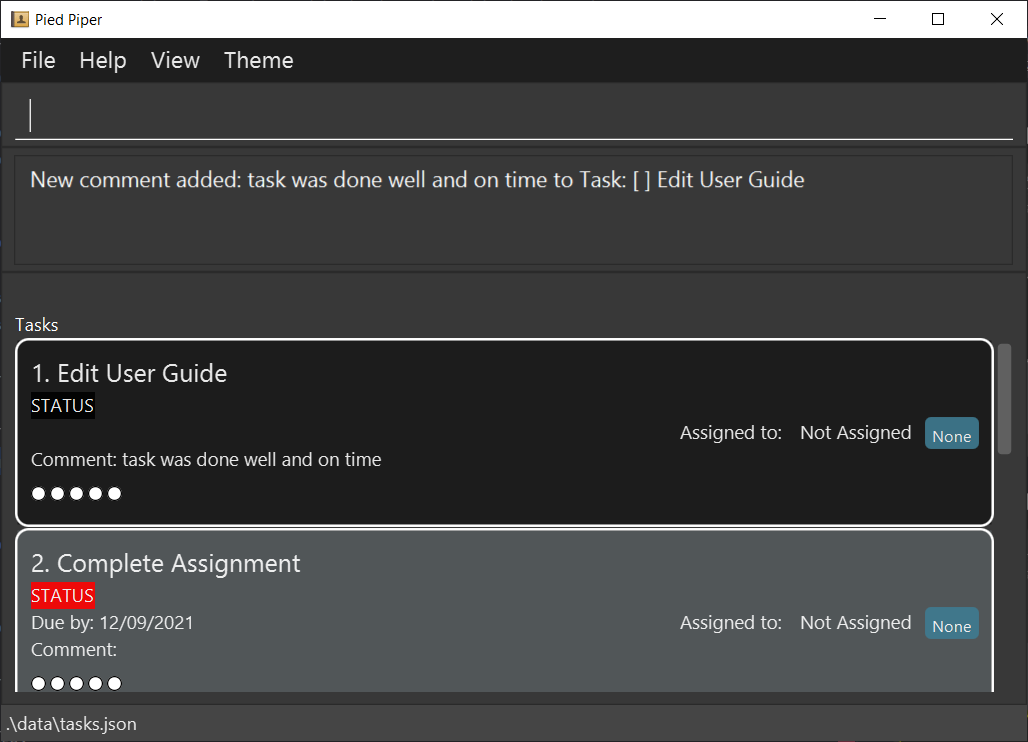
2.5 Commenting on a task: comment
Adds a comment to a task that exists in the task list. The task index follows
The task list can be viewed by using the view command.
Format: comment t/TASK_INDEX c/COMMENTS
Note: The length of comment is limited to 50 characters.
Example:
comment t/1 c/task was done well and on time
2.6 Editing a person: edit
Edits the properties of an existing person in the persons list. At least one optional field must be supplied.
The person list can be viewed by using the list command.
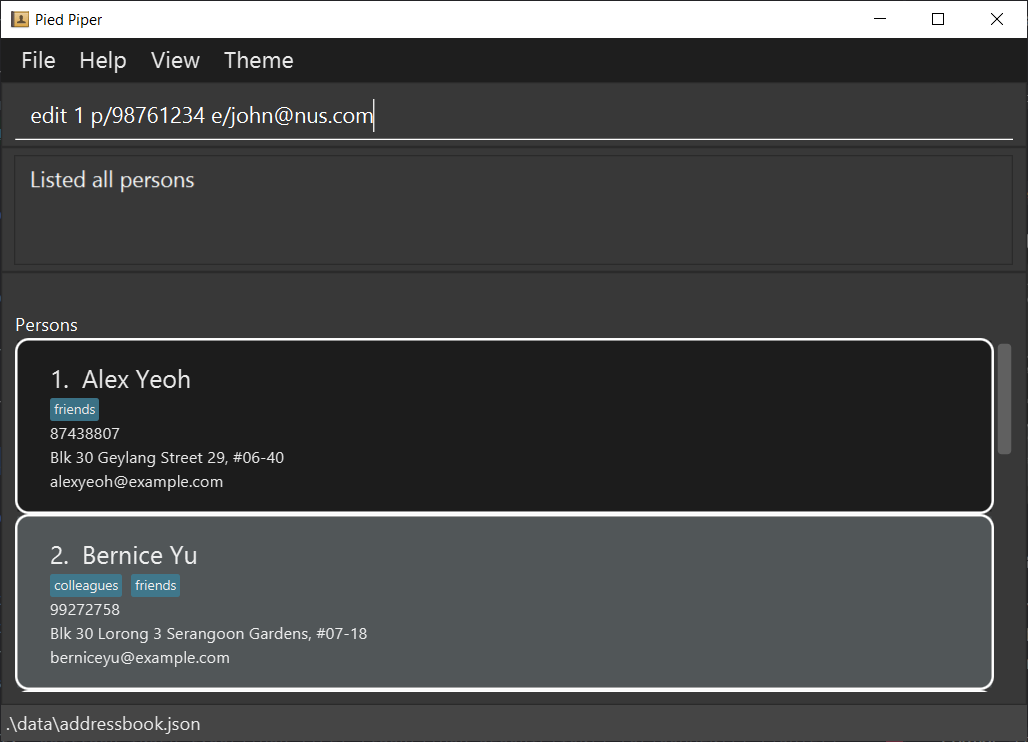
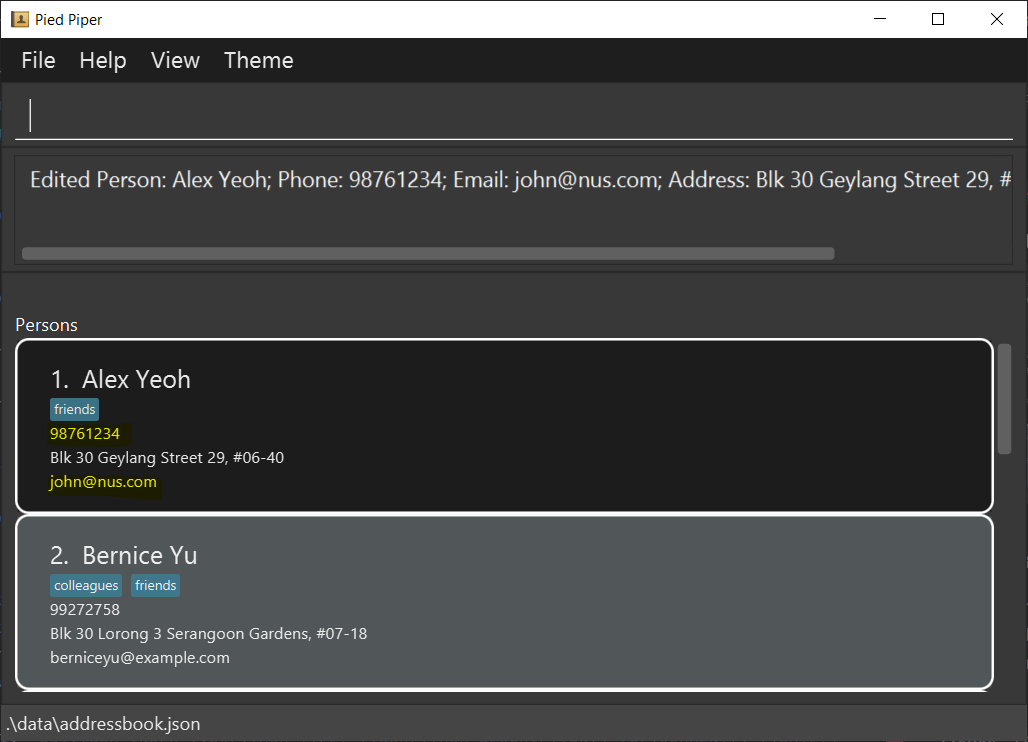
Format: edit INDEX [n/NAME] [p/PHONE] [e/EMAIL] [a/ADDRESS] [r/ROLE]
Example:
edit 1 p/98761234 e/john@nus.com- Before:
After:
2.7 Editing a task: edittask
Edits the details of the task identified by the index number used in the displayed task list.
Existing values will be overwritten by the input values. The desired task type must be specified, and the date
modifiers must match the format of the task type input. At least one optional field must be supplied.
Todo tasks should not include a DATE field.
The task list can be viewed using the view command.
Format: edittask INDEX type/TASK_TYPE [task/TASK_DESCRIPTION] [c/COMMENT] [DATE]
Note:
- To denote todo, deadline and event tasks, parameters for
TASK_TYPEareT,DandErespectively. - When editing a task to change types, the DATE parameters follow the formats of deadline task and event task.
- Editing a task removes the assigned member from the task.
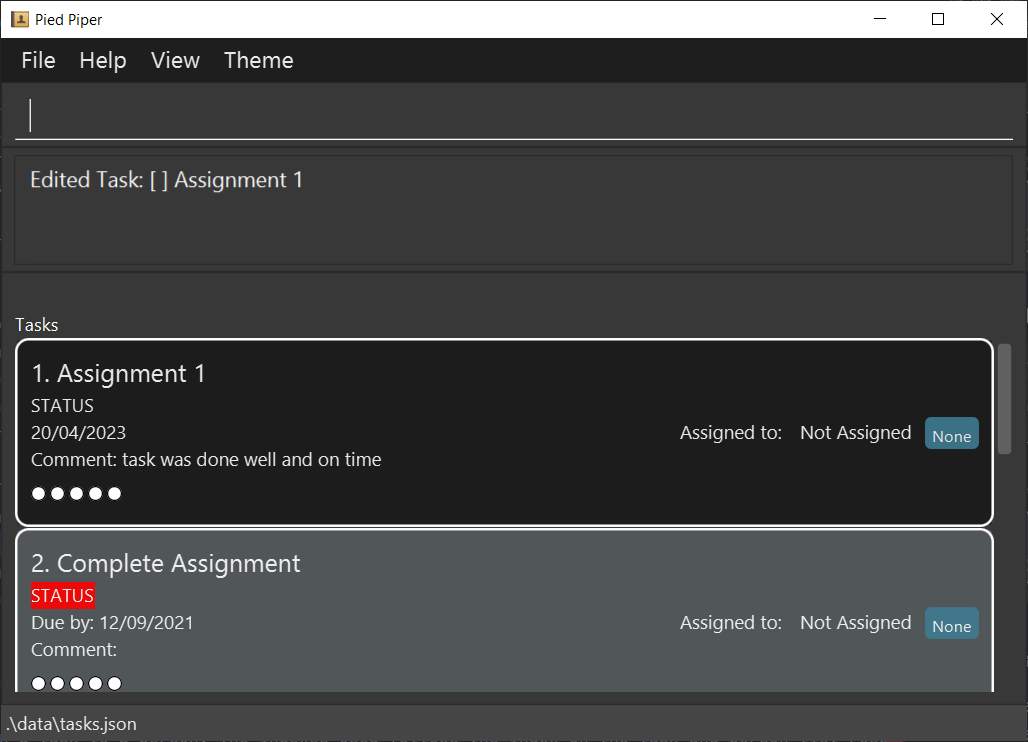
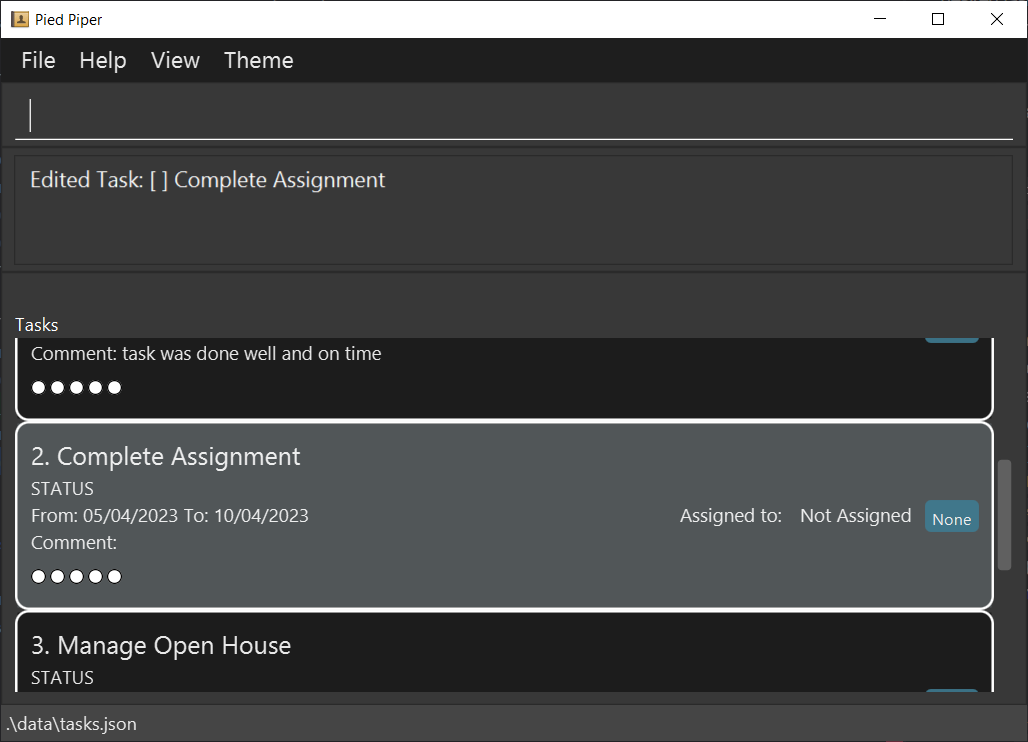
Examples:
- Changing an existing task at index 1 to a
deadlinetask, with a different nameedittask 1 type/D task/Assignment 1 by/20/04/2023
- Changing an existing task at index 2 to an
eventtask, with the date changededittask 2 type/E from/05/04/2023 to/10/04/2023
2.8 Assigning task to member: assign
Assign a task to a person. The indexes used follows the index on the task and person list respectively.
The task list can be viewed using the view command, and the persons list can be viewed using the list command.
Note:
- For every task, only one person can be assigned to it.
Format: assign t/TASK_INDEX i/MEMBER_INDEX
Note: Assigning a task to a person requires the person to be assigned to a role. You will get an error in case you try to assign task to a person/member who does not have a role.
Examples:
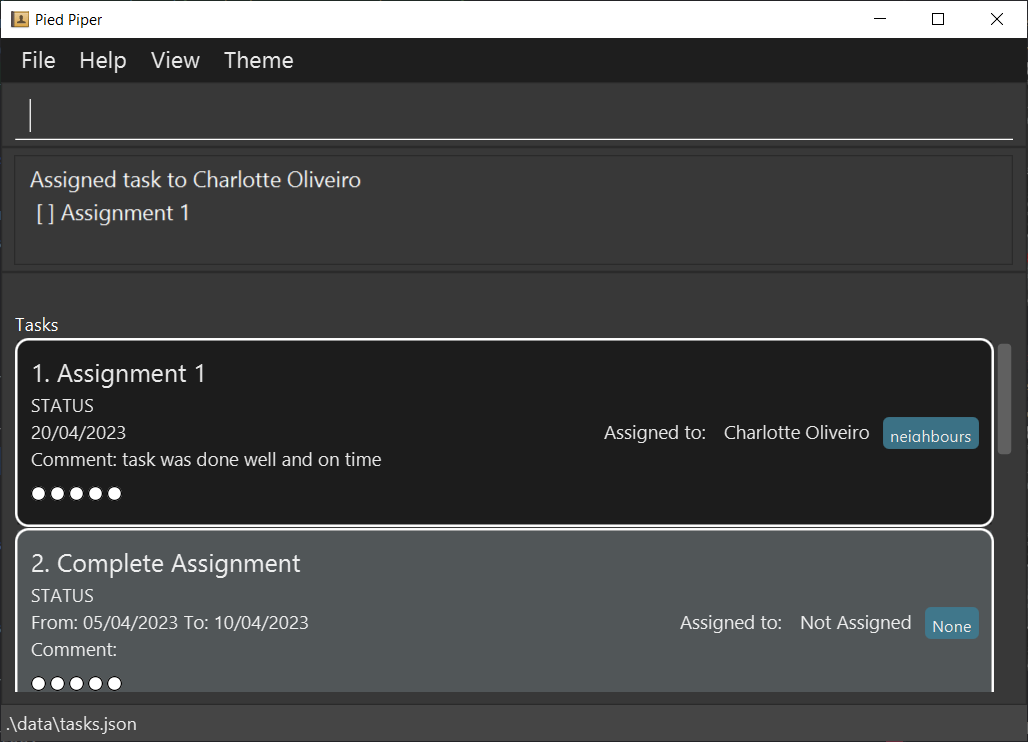
assign t/1 i/3
2.9 Marking a task: mark
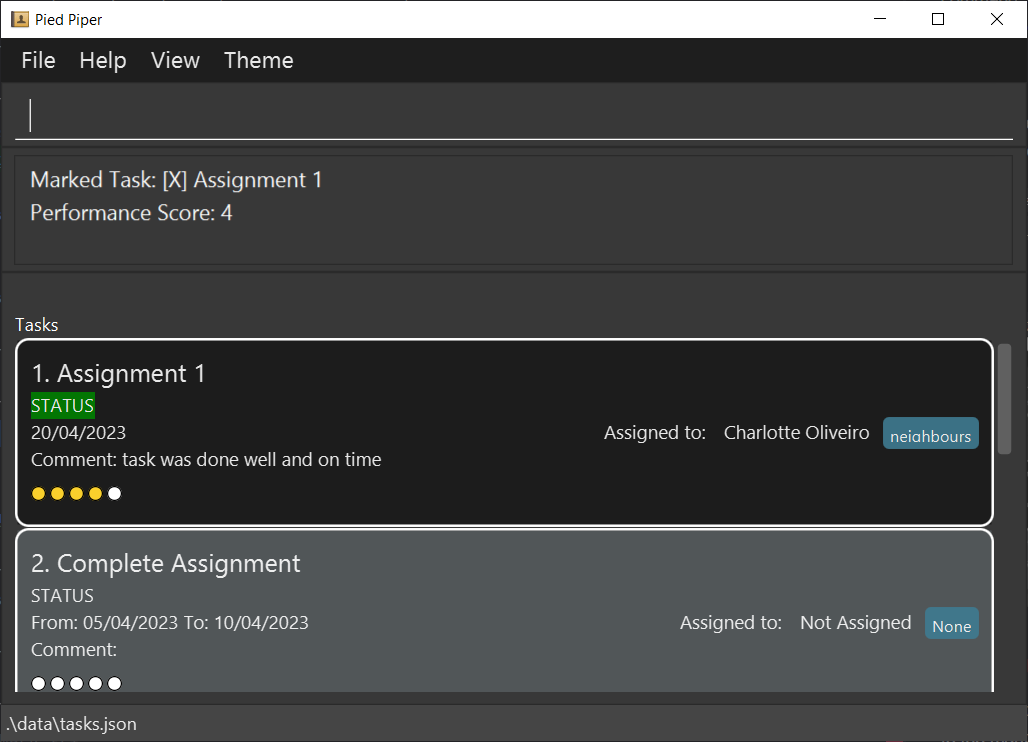
Marks the target task as completed and give a score to the marked task.
The task list can be viewed using the view command.
Format: mark t/TASK_INDEX s/PERFORMANCE_SCORE
Note: A task cannot be marked if it is not assigned to anyone.
Examples:
mark t/1 s/4
2.10 Unmarking a task: unmark
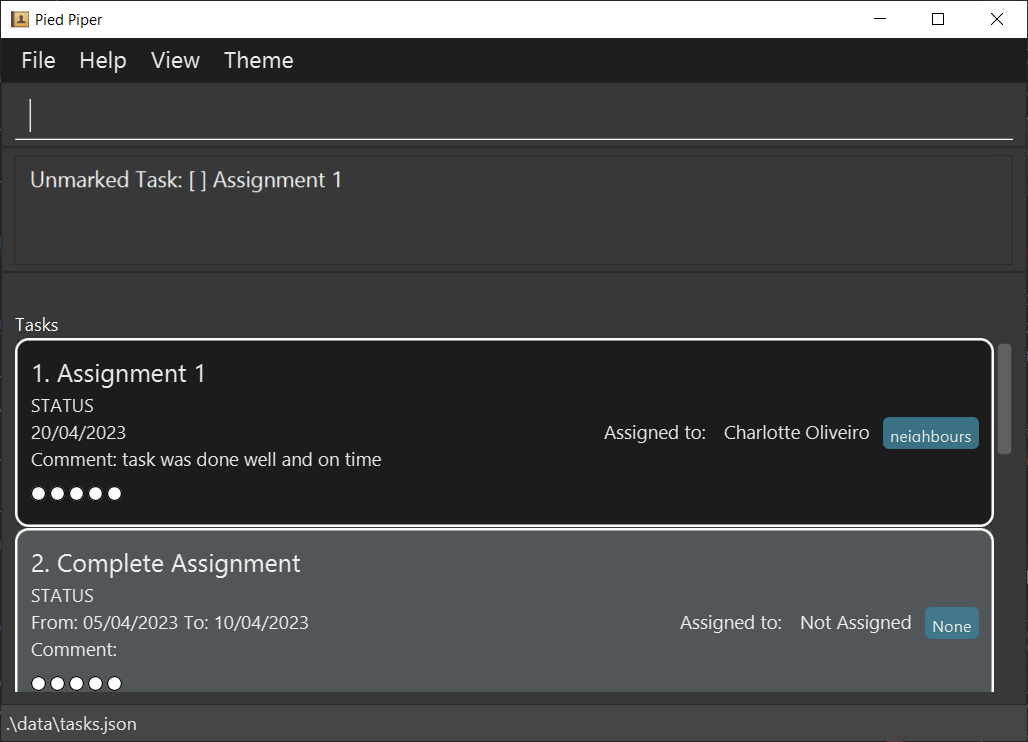
Sets the target task’s status as incomplete and remove any given score.
The task list can be viewed using the view command.
Format: unmark t/TASK_INDEX
Examples:
unmark t/1
2.11 Deleting a person: delete
Deletes an existing person at the given index.
The task list can be viewed using the view command.
Format: delete MEMBER_INDEX
Note: In case the person to be deleted is assigned to task(s), those tasks would be unassigned immediately, no matter whether the task is completed or not.
Examples:
delete 1
2.12 Deleting a task: deletetask
Deletes an existing task at the given index.
The task list can be viewed using the view command.
Format: deletetask TASK_INDEX
Examples:
deletetask 2
2.13 Listing tasks: list
Shows all persons.
Format: list
2.14 Viewing persons: view
Shows all tasks.
Format: view
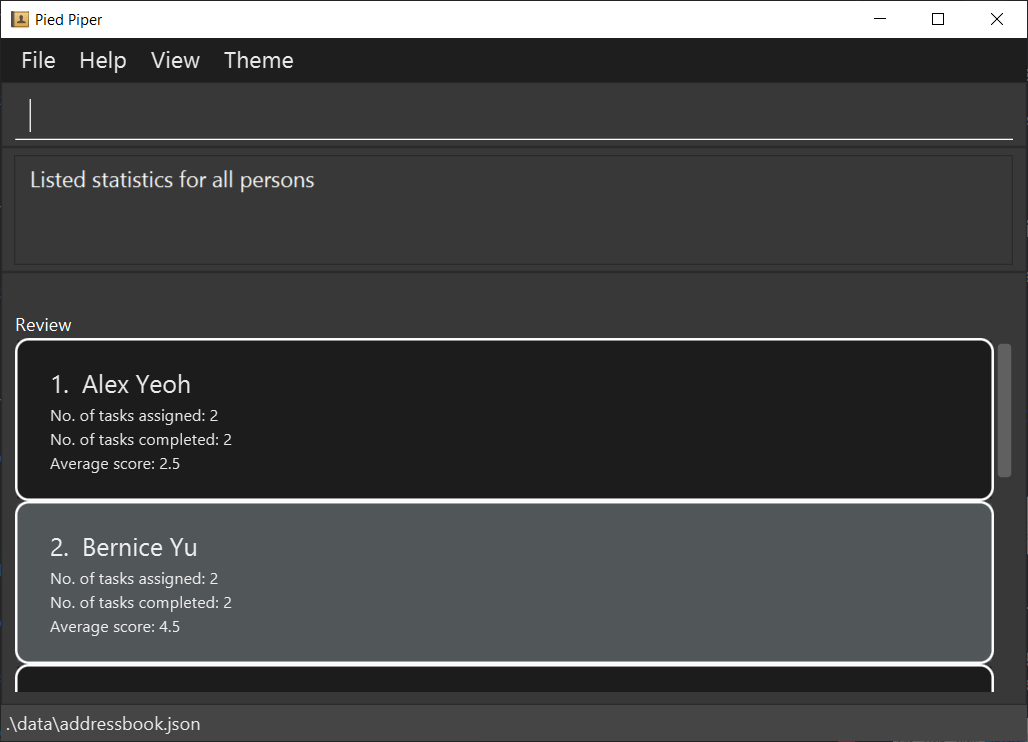
2.15 Viewing statistics: review
Shows task and score statistics of all persons in the persons list.
Format: review
2.16 Getting help: help
Opens a window linking to this user guide

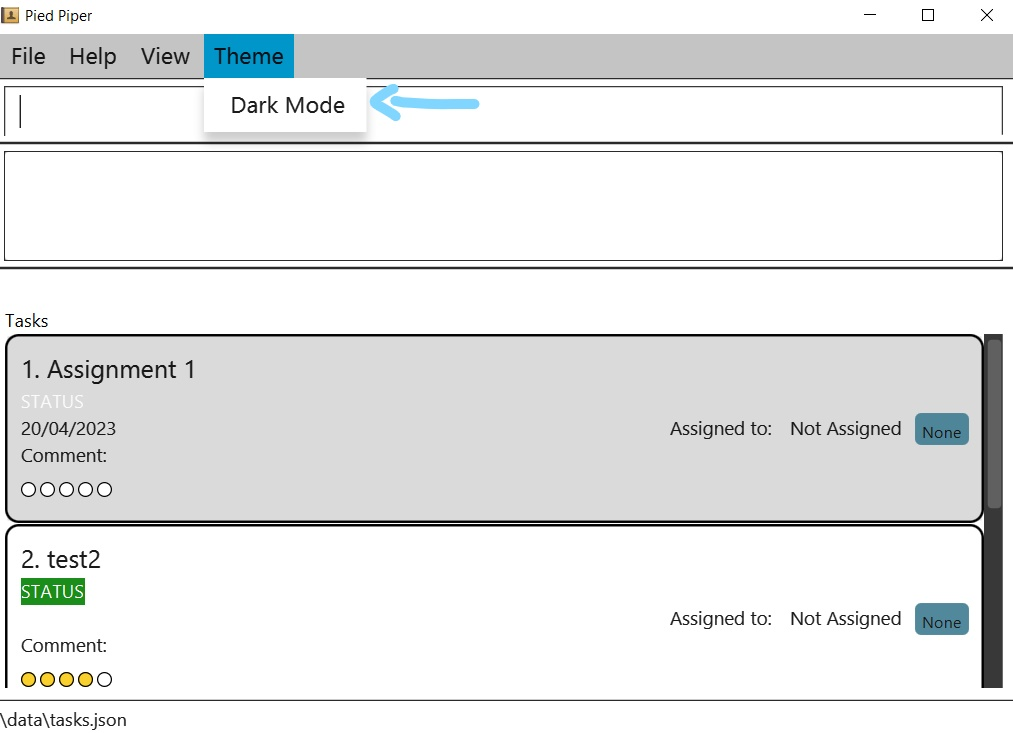
2.17 Toggling between light and dark mode
Allows for toggling between light mode and dark mode based on user preference.
3. FAQ
Q: How do I transfer my data to another Computer?
A: Install the app in the other computer and overwrite the empty data file it creates with the file that contains
the data of your previous Pied Piper home folder.
Q: How do I check my Java version?
A: Check here.
Q: Where do I download the correct Java version?
A: Download from here.
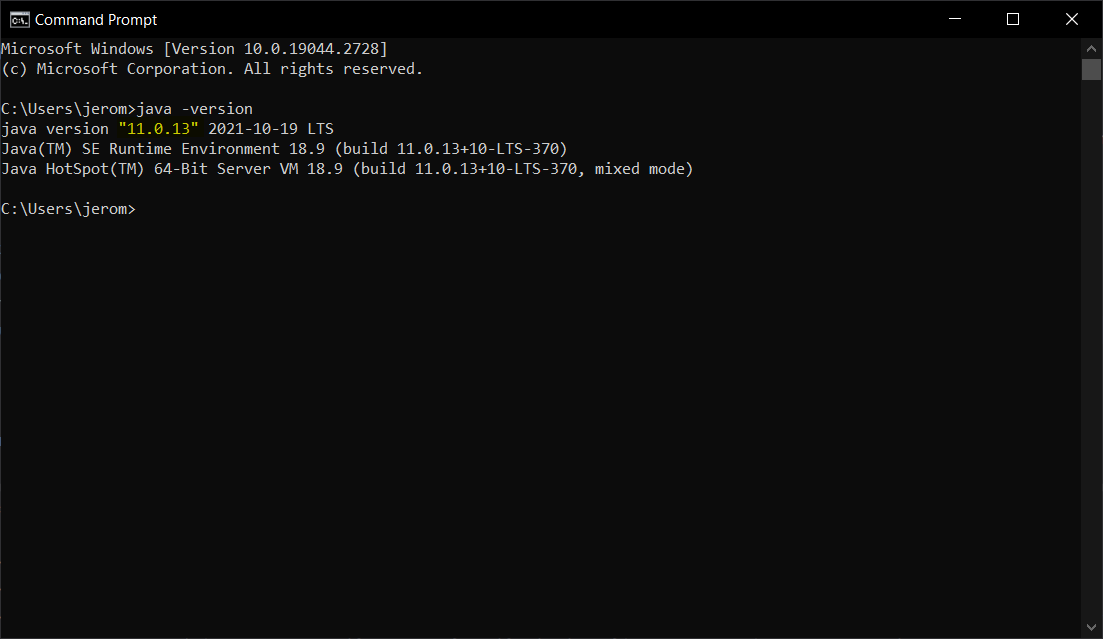
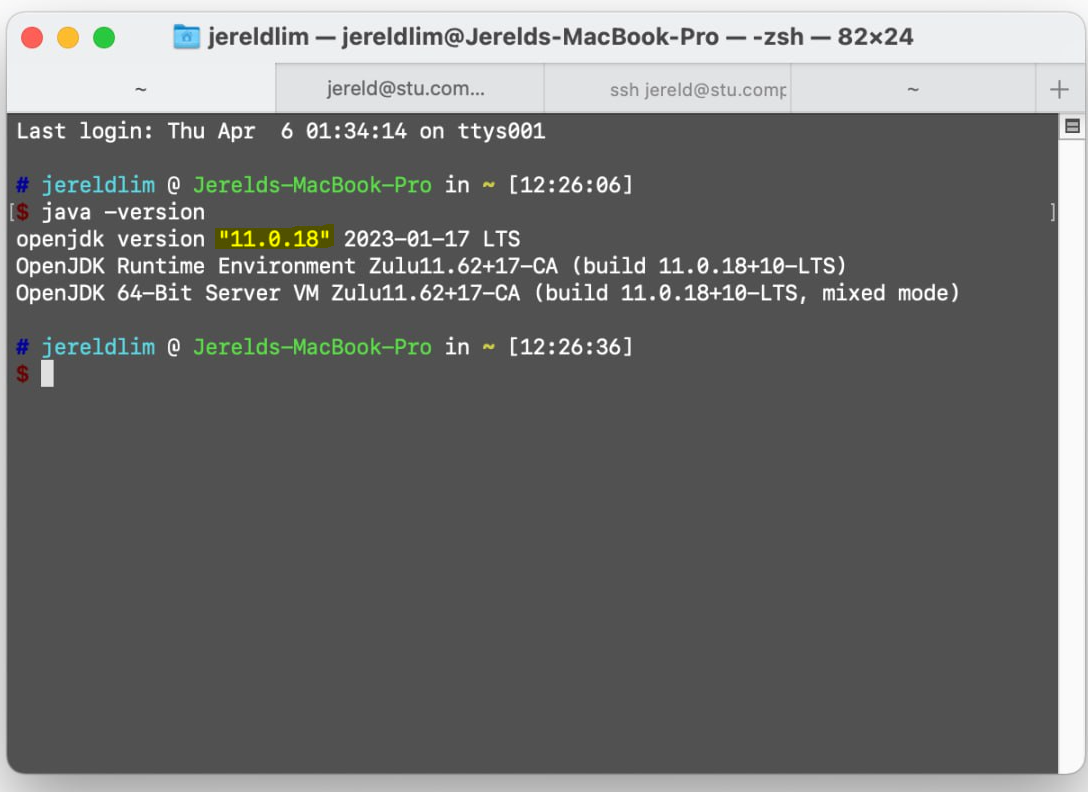
4. How do I check my Java version?
For windows:
- Open your system’s command line by searching
cmdin the windows search bar. - Enter the command
java -version. - You should see the version of java installed here highlighted in yellow:
For mac:
- Use the spotlight search bar and search using
terminal. - Enter the command
java -version. - You should see the version of java installed here highlighted in yellow:
5. Command summary
| Action | Format, Examples |
|---|---|
| Add | add n/NAME p/PHONE e/EMAIL a/ADDRESS [r/ROLE]e.g., add n/Jane Roe p/98123456 e/janer@nus.com a/Jane street, block 321 r/Member |
| Assign | assign t/TASK_INDEX i/MEMBER_INDEXe.g., assign t/1 i/3 |
| Comment | comment t/TASK_INDEX c/COMMENTSe.g., comment t/1 c/task was done well and on time |
| Deadline | deadline task/TASK_NAME by/DATEe.g., deadline task/Complete Assignment by/12/09/2023 |
| Delete person | delete MEMBER_INDEXe.g., delete 1 |
| Delete task | deletetask TASK_INDEXe.g., deletetask 2 |
| Edit person | edit INDEX [n/NAME] [p/PHONE] [e/EMAIL] [a/ADDRESS] [r/ROLE]e.g., edit 1 p/98761234 e/john@nus.com |
| Edit task | edittask INDEX type/TASK_TYPE [task/TASK_DESCRIPTION] [c/COMMENT] [DATE] e.g., edittask 1 type/D task/Assignment 1 by/20/04/2023 |
| Event | event task/TASK_NAME from/DATE to/DATEe.g., event task/Manage Open House from/11/12/2023 to/16/12/2023 |
| Help | help |
| List tasks | list |
| Mark | mark t/TASK_INDEX s/PERFORMANCE_SCOREe.g., mark t/1 s/4 |
| Todo | todo task/TASK_NAMEe.g., todo task/Edit User Guide |
| Unmark | unmark t/TASK_INDEXe.g., unmark t/1 |
| View persons | view |
| View statistics | review |
